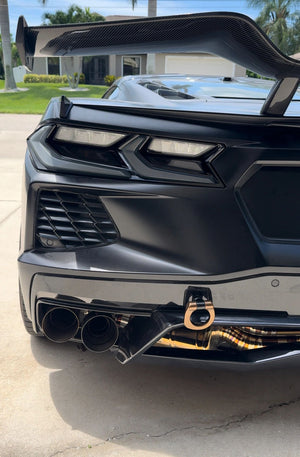
How to lower C8 Corvette
Aug 14, 2025
How to Lower a C8 Corvette Using Lowering Collars and Wrenches (Rear Only)
Purchase your C8 Stingray Collars here
Purchase your C8 Z06 Collars here
Purchase your “Paragon Logo” Wrenches here
Purchase your “Corvette Logo” Wrenches here
Lowering your C8 Corvette is one of the easiest ways to enhance both its stance and performance. If you're looking to get rid of that stock wheel gap without compromising ride quality, lowering collars and rear adjustment wrenches are the way to go. This guide walks you through the steps of lowering your C8 using front lowering collars and adjusting the rear with basic tools.
🔧 What You'll Need
- Torque Wrench to 125ft/lbs
- 1/2" Ratchet or Breaker Bar
- 3/8" Ratchet or Breaker Bar
- 3/8" 3" Extension
- Spring Compressor
- 21mm Wrench
- 22mm Socket
- 21mm Socket
- 19mm Socket
- 13mm Socket
- 11mm Socket
- Small Flat Head Screwdriver
- Plastic or Rubber Mallet
- Floor Jack or Lift
Optional Tools
- Sharpie Marker
- Drip Pan
- De-Pin Tool
- Mag Ride Socket
🏁 Why Lower Your C8?
-
Improved handling: Lowering the center of gravity improves cornering stability.
-
Better aesthetics: Reduces wheel gap for a more aggressive stance.
-
Maintains factory ride: When done correctly with factory suspension components, ride quality stays comfortable.
🛠️ Step-by-Step: Front Lowering with Collars
First open the frunk of your vehicle
-
Remove the plastic trim panels and set aside

- Locate the strut mount

- Unlock the red tab, then press the black tab

-
Pull apart the connector

-
Remove the two nuts with a 13mm socket, 3” extension and ratchet

-
Remove last nut and reinstall hand tight. This nut will be removed at a later time.

-
Raise your vehicle with your preferred method.

-
Remove your wheels with a 22mm Socket.

-
Place drip tray to catch any brake fluid that may spill.

-
Remove 11mm Banjo Bolt.

-
Unclip Front Lift Connector.

-
Remove 21mm bolt and nut from the lower control arm.

-
Unclick the red tab and press the black tab to unplug the connector.

-
Use a 11mm socket with a 3" extension and ratchet.

-
CAUTION Brake fluid is corrosive, avoid contact with skin and paint.

-
Use a 21mm wrench and socket to remove the bolt holding the strut to the control arm.

-
Press down on the hub assembly to relieve pressure for ease of removal of the bolt.

-
Rotate hub assembly.

-
Hold the strut and remove the nut from the top strut tower.

-
Depress the assembly, slide the strut up and out.

-
Remove the strut from the strut tower.

-
Mark strut for orientation of components for easier install.

-
Unclip the cover around the Mag Ride Connector.

-
Slide the purple terminal release clip to alian with terminals.

-
TIP: Take a photo of the pin orientation for reassembly.

-
Squeeze rubber grommet and remove.

-
Install Spring Compressor

-
Alternate tightening sides until the spring is free from the strut mount.

-
Use Mag Ride socket to loosen the top hat nut

-
Remove top hat nut, then the top hat.

-
Remove spring assembly

-
Remove Bump Stop

-
Remove Bump Stop Cap

-
Finally remove the Front Lift and the OEM Collar.

-
INSTALLATION
-
Time to install the Paragon Performance Lowering Collar

-
Set new mark for install of front lift, then slide on the Lowering Collar until seated.

-
Reinstall Front Lift aligning with previous made marks.

-
Reinstall Bump Stop Cap using a soft mallet until seated.

-
Reinstall bump stop, and spring assembly to previous markings.

-
Reinstall top hat using previous markings, then hand tighten but do NOT torque the top hat nut.

-
Loosen your spring compressor, adjust marks accordingly.

-
Remove your spring compressor, then torque top hat nut to 24ft Ibs.

-
Reinstall rubber grommet.

-
Reference your photo and reassemble your Mag Rid connector.

-
Check to make sure terminals are seated properly.

-
Attach your Mag Ride connector cover.

-
Reinstall your strut making sure to align top hat with chassis.

-
Push down on your hub assembly and lift the strut over and into place.

-
Reinstall the 21mm bolt. Push down to relieve pressure from the control arm.

-
Turn your hub assembly straight and hand tighten the 21mm nut to the bolt.

-
Using a 21mm wrench and 21mm socket tighten the bolt and nut.

-
Torque to 118ft Ibs.

-
Tighten your banjo bolt using 11mm socket, 3" extension and ratchet.

-
Torque to 30ft Ibs and reclip your front lift connector.

-
Lower your vehicle to access the strut tower.

-
Hand tighten the nuts for the strut.

-
Torque to 22ft Ibs and reconnect Mag Ride. Then repeat steps for the other side of the vehicle.

-
Top off Front Lift reservoir with DOT 4 brake fluid.

-
Reinstall plastic trim and wheels, torque to 140ft Ibs.

-
Test front lift to bleed brake fluid through the system.

🔧 Adjusting the Rear Height with Wrenches
-
Jack Up the Rear
Secure the car with jack stands. -
Locate the Rear Coilover Perch
The rear suspension of the C8 uses adjustable spring perches. -
Use the Spanner Wrench
Turn the lower spring perch collar downward to lower the car. One full turn usually equates to about 1/8" of drop. Use a tape measure to ensure both sides are even. -
Fine Tune and Lower the Car
Once adjustments are done, lower the car and drive it around the block. Let the suspension settle, then measure again and make final tweaks if needed.
📏 Drop Specs
-
Front: 0.75”
-
Rear: 0.75”
Note: Avoid going too low if you daily drive the car—especially if you live in an area with speed bumps or steep driveways.
🧰 Final Thoughts
Lowering your C8 Corvette with lowering collars in the front and adjusting the rear with a wrench is a budget-friendly, DIY-friendly modification that makes a noticeable difference in both looks and performance. Just remember to get an alignment after making any suspension changes to preserve tire wear and handling characteristics.
Got questions or need help with specific parts? Drop a comment or shoot me a message—happy to help you get your C8 dialed in right.


